Set up payment methods
- Version
- 4.0 preview
- Updated
Audience: store admins · Scope: the payment method form · Last reviewed: 2026-08-15
What this does — Defines how customers can pay: which payment provider handles each option, what surcharge (if any) it adds, and who gets offered it. A store typically runs a handful — say bank transfer, PayPal and a card provider.
Steps
-
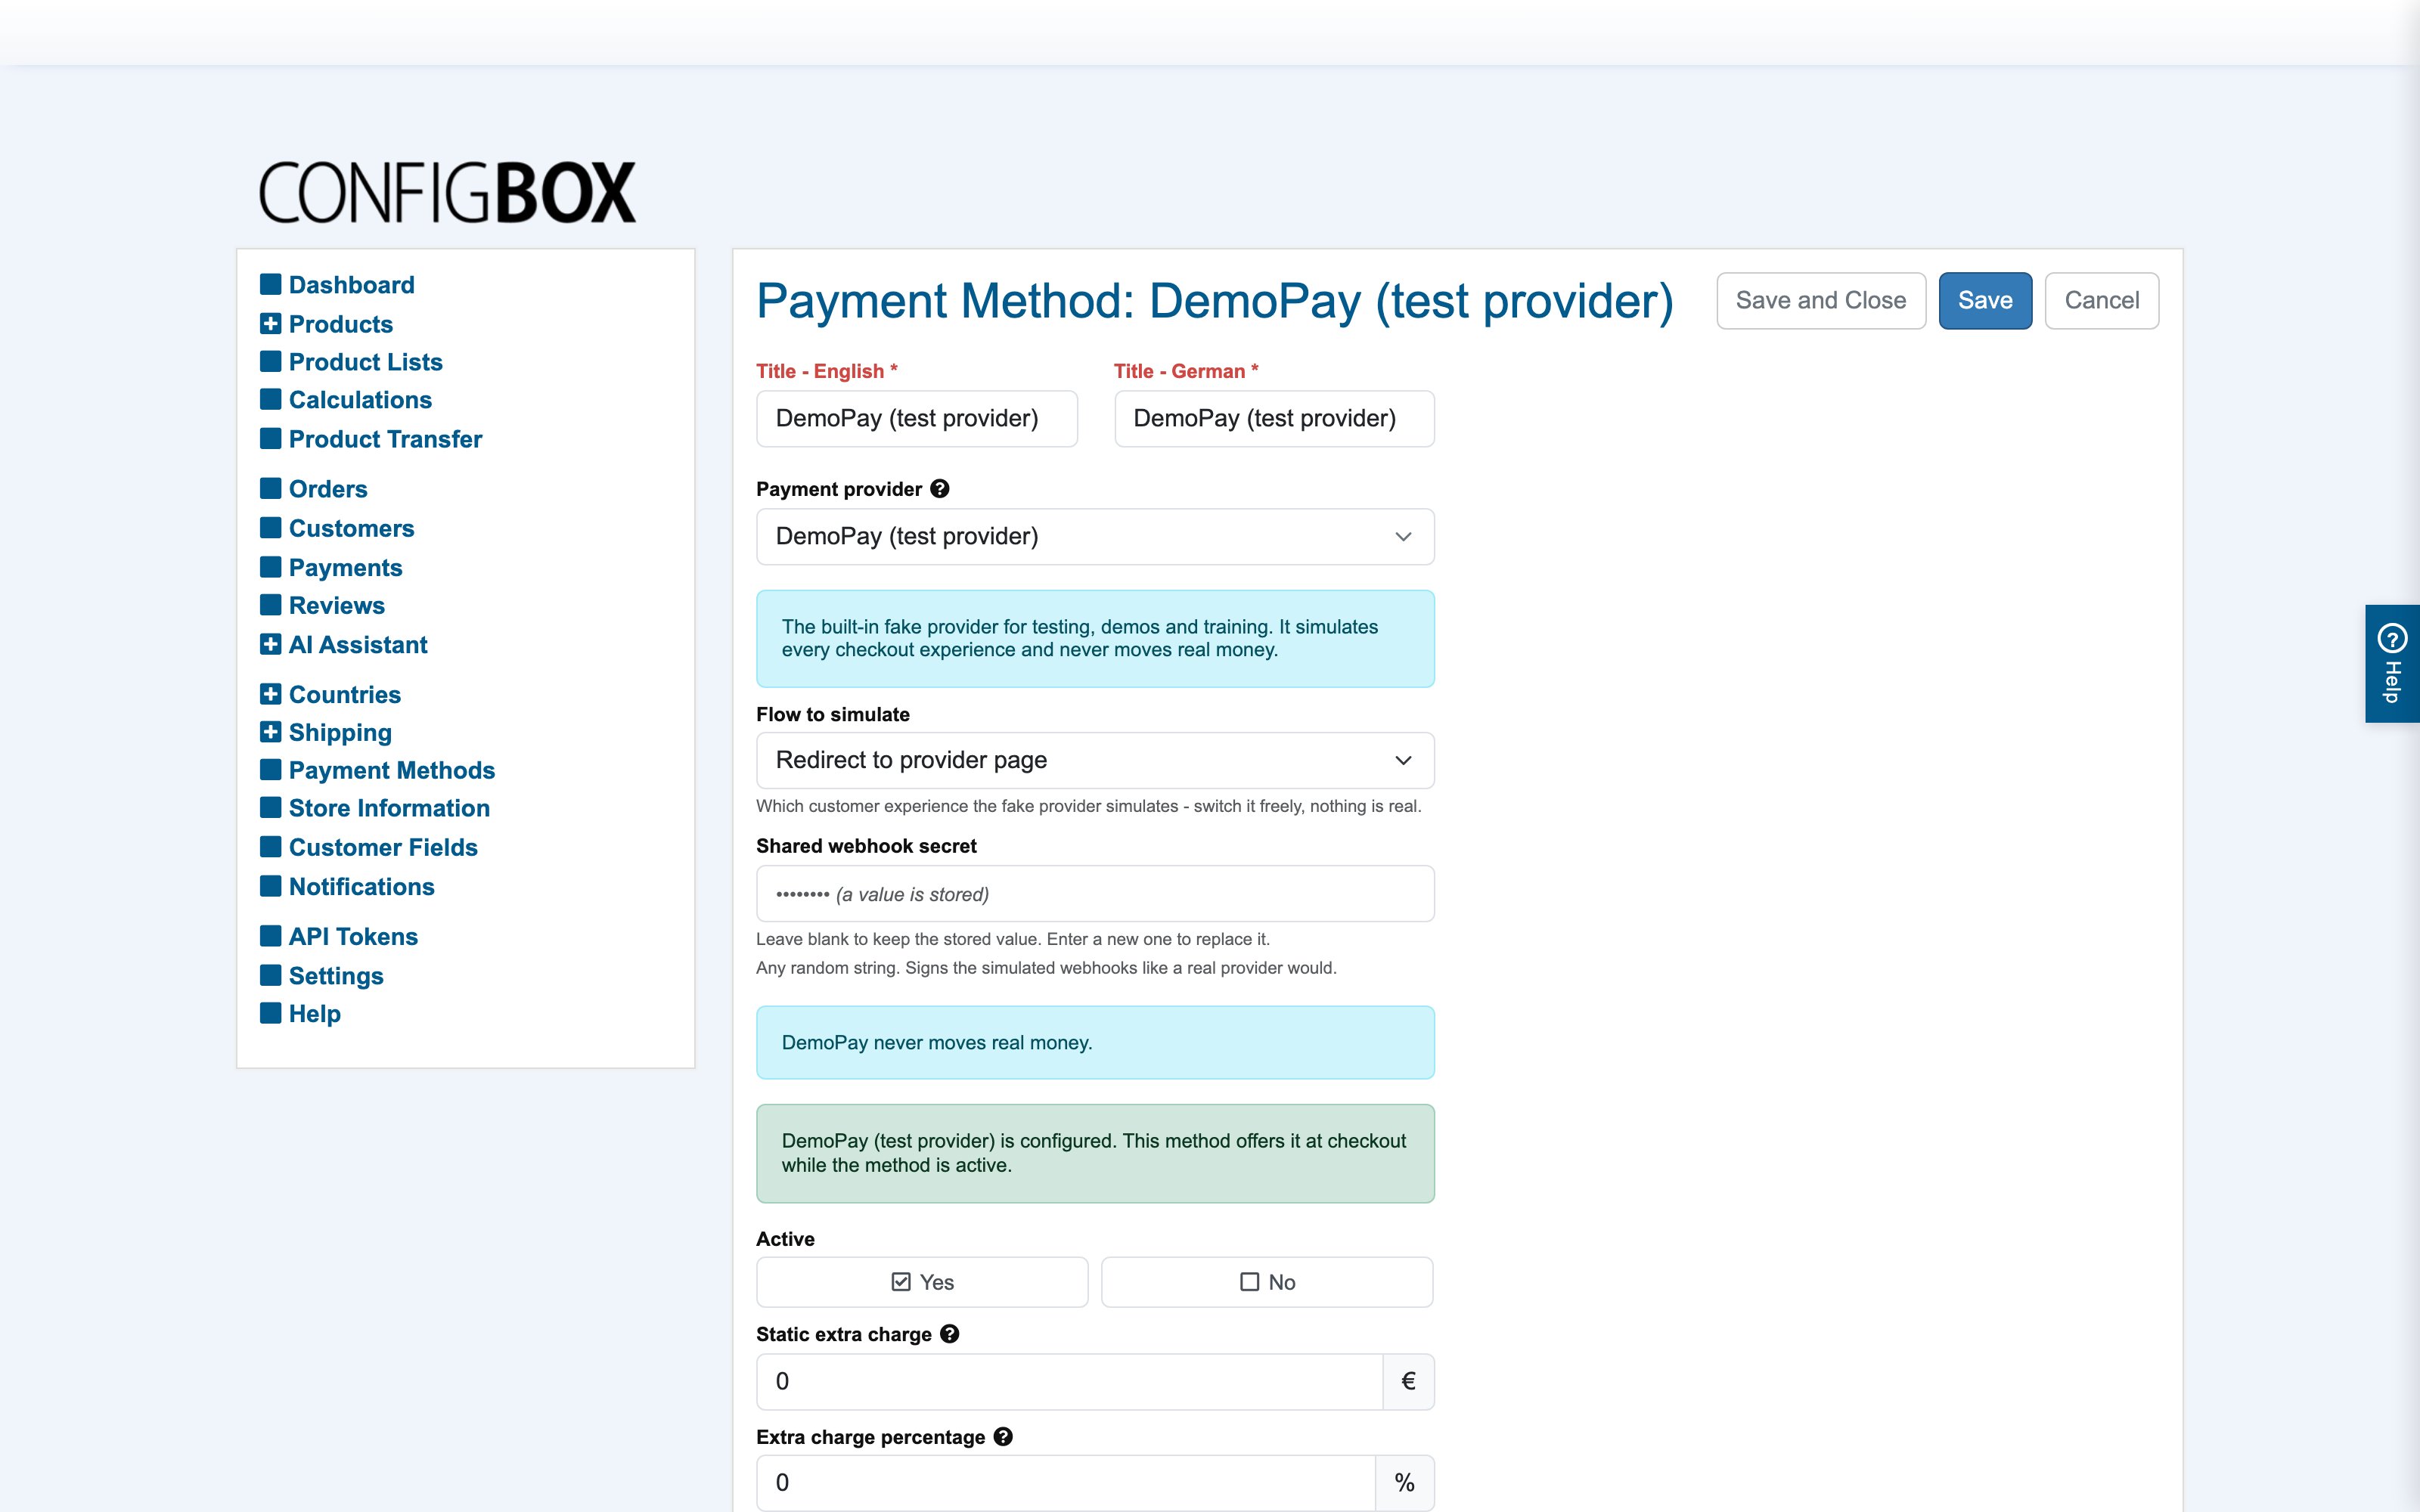
Go to Payment Methods, open one or Add:
-
The essentials:
- Title per language — what checkout shows ("Bank transfer").
- Payment provider — who handles the money. Choosing one immediately shows that provider's own settings right below, no save needed. Fields marked as required are what the provider needs before it can take a payment — see Payment providers for every provider's fields and where its credentials come from.
- The status note under the provider's fields tells you where you stand: an orange note names what is still missing, a green one confirms the provider is ready.
- Active — offered or not.
-
Optional surcharge — use sparingly, and mind local law:
- Static extra charge plus Extra charge percentage of the order; the combined result is clamped between Minimum and Maximum Extra Charge, and taxed per the method's Tax Class.
-
Optional availability limits:
- Available for these customer groups — e.g. "payment on invoice" for the trade group only.
- Available for these countries — the country list is collapsed behind a counter; expand it, or type in the filter box to find countries quickly. Select All and Deselect All apply to what the filter currently shows.
-
Save, and order the methods in the list the way checkout should present them.
What happens next
Checkout offers each active method whose group and country restrictions match the buyer — but only if its provider is fully configured. A half-configured method saves fine (handy while you wait for credentials) and is simply not shown to customers until the status note turns green.
When a customer pays, the order first waits on Awaiting payment; the provider's confirmation flips it to Paid (or to Incorrect amount paid if the amounts disagree). Every attempt is recorded — see Track payments.
Good to know
- Credentials are stored encrypted and are never shown again: a saved key displays as "a value is stored". Leave the field blank to keep it; type a new value to replace it.
- Some providers show a note with a webhook URL to register in the provider's own dashboard. Doing that lets payment confirmations arrive even when the customer closes the browser right after paying — worth the two minutes.
- Test the full round trip for every online provider in their sandbox/test mode before going live: order → pay → order lands on Paid → the Paid notification email arrives.
- The Legacy connector choice remains for methods set up before the provider system; new methods should always pick a provider.