Run the setup wizard
- Version
- 3.x
- Updated
Audience: store admins setting up a new store · Scope: the first-run assistant · Last reviewed: 2026-07-22
What this does — Walks you through the handful of settings CBX needs before you build anything: your licence key, the languages you sell in, your tax basis, your store's identity and your currencies. It runs once, the first time you open CBX.
Nothing you enter here is permanent — every field has a normal screen elsewhere in the menu, and the wizard tells you which one. Two answers are worth thinking about before you click through, though, because changing them later means revisiting work you have already done: the languages you pick and your base currency.
Before you start
- Have your licence key to hand — it is in your account on the CBX website.
- Know which country your business operates from and whether you sell mainly B2B or B2C. If in doubt, read the two bullets in step 3 before choosing.
Steps
The six steps below are what a Joomla-hosted store sees. Two hosts see fewer — see the platform note after the last step.
-
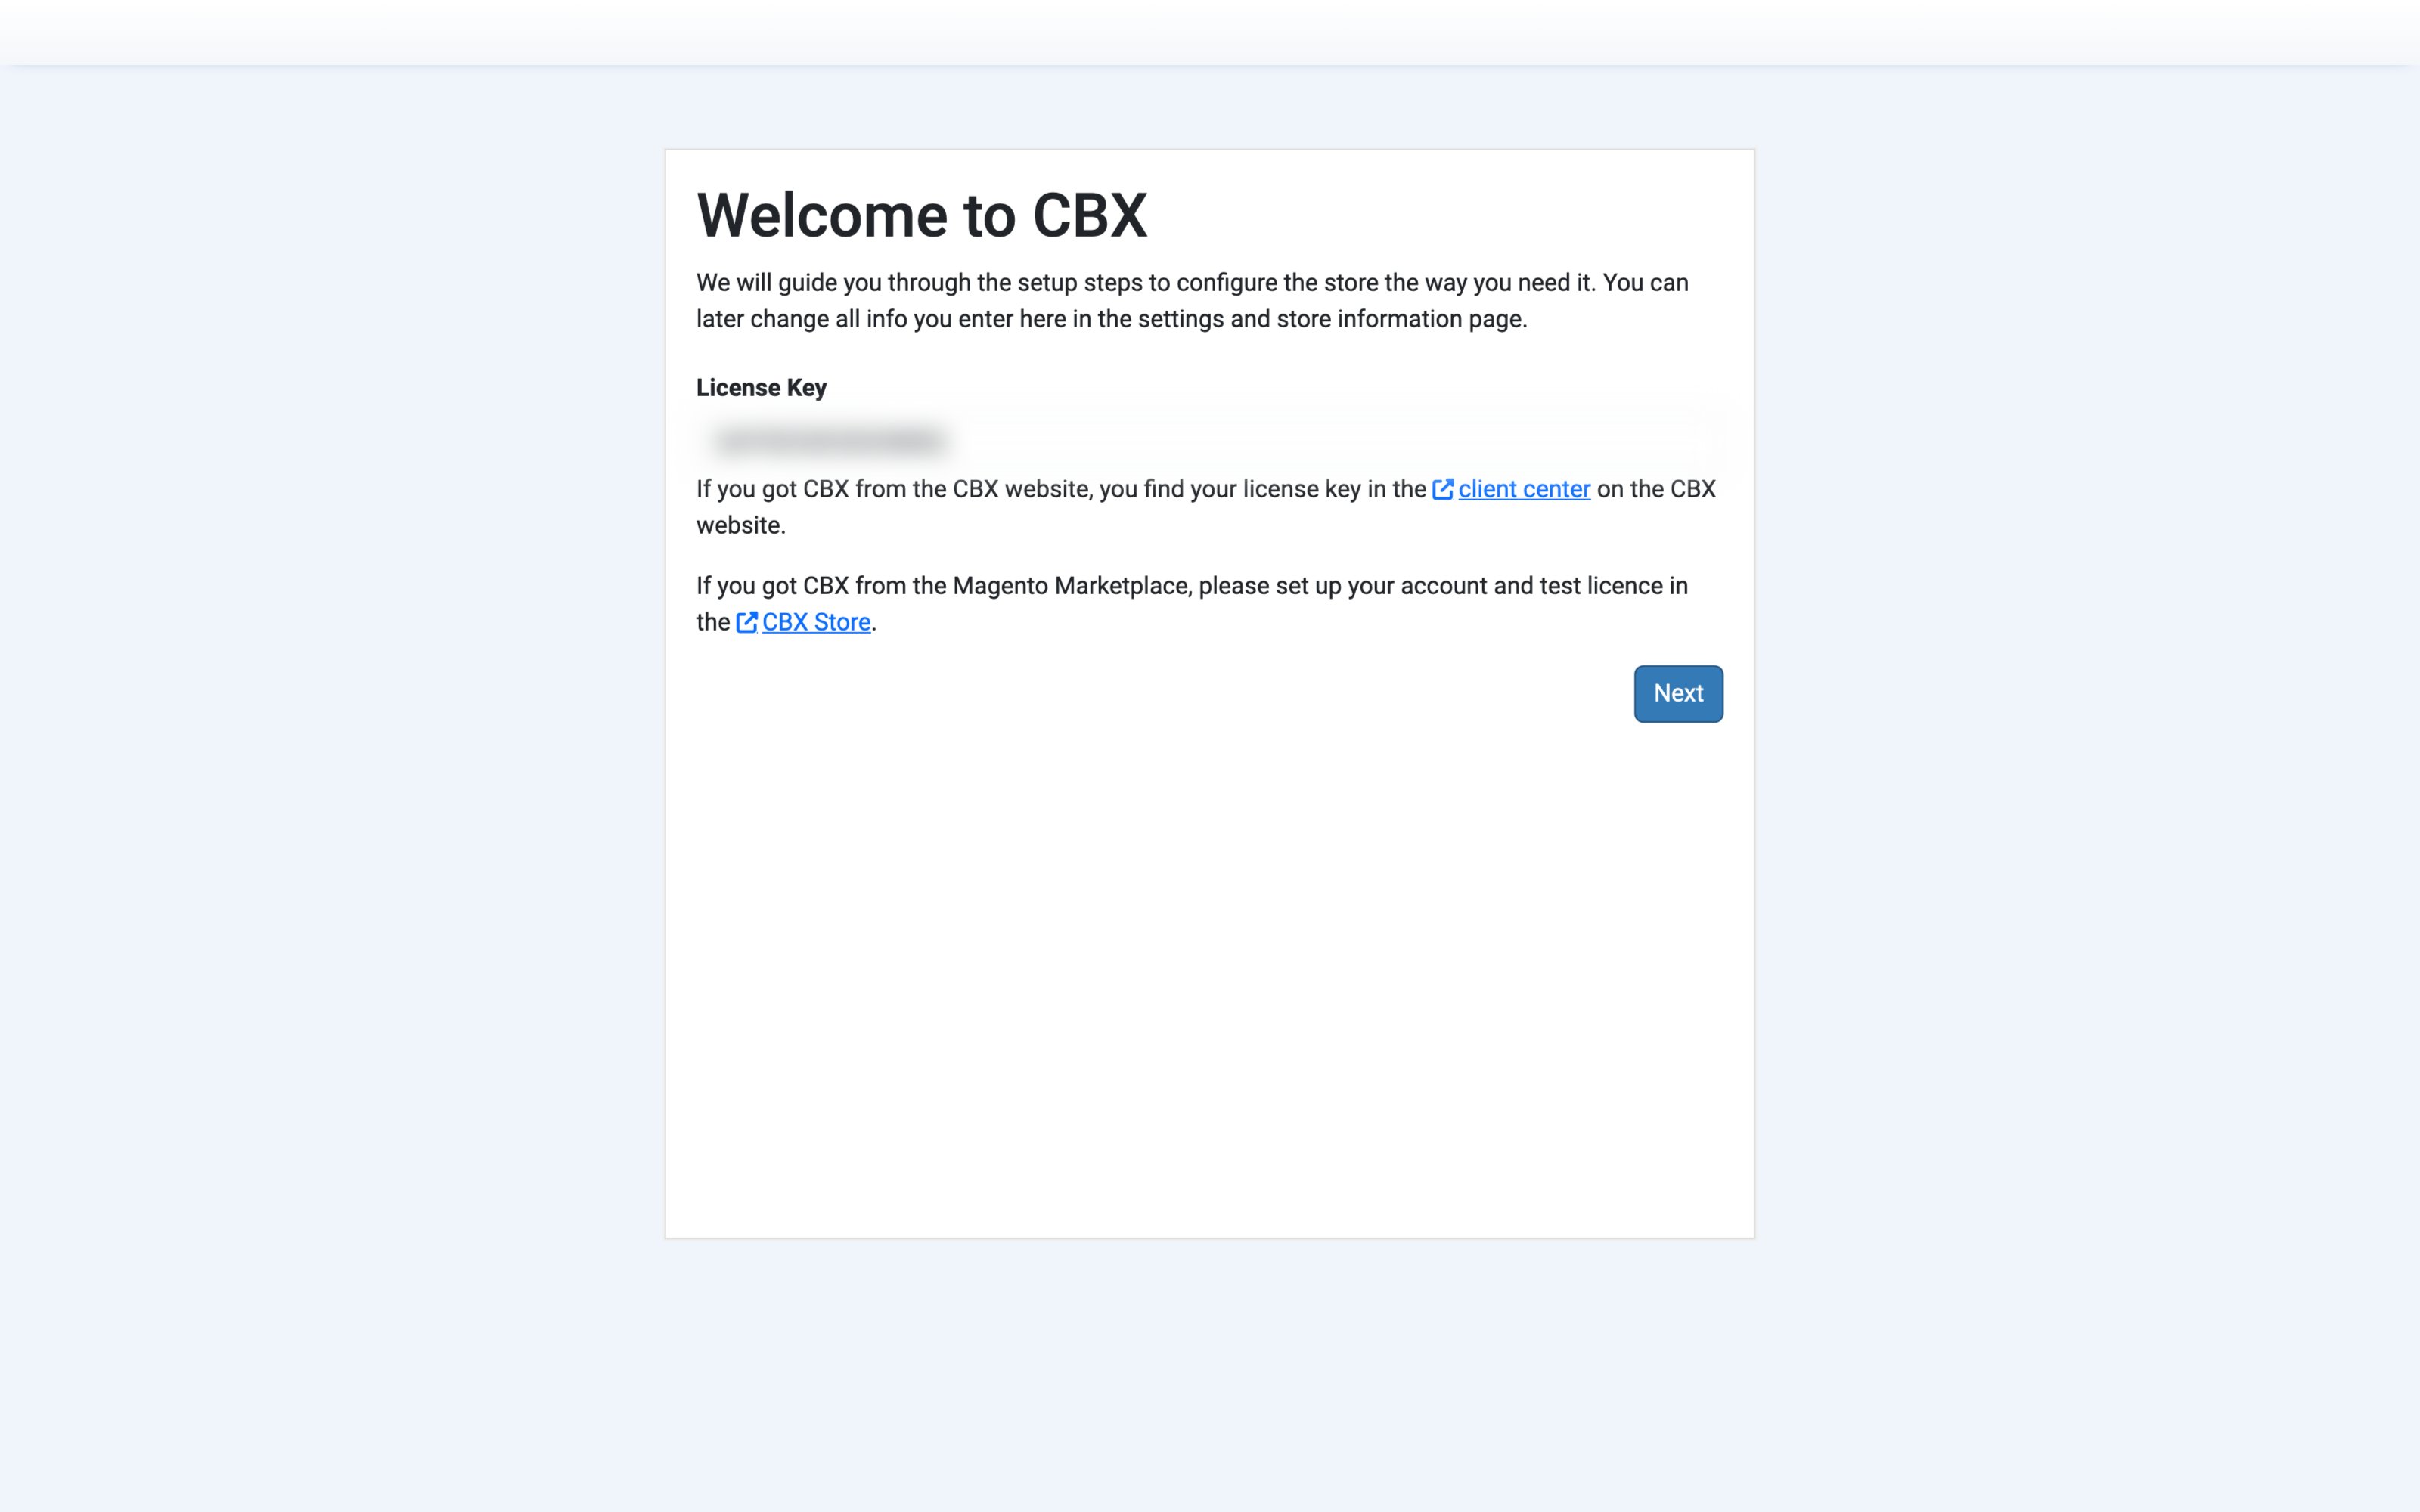
Welcome to CBX — enter your License Key and click Next.
-
Language settings — pick the languages your store will run in. CBX offers the languages your site has installed; Click to see platform languages expands the list.
This is the choice worth pausing on: every language you select adds an input box to every translatable field from then on — product titles, question titles, answers, descriptions. Pick the languages you will actually publish, not the ones you might one day want.
-
Taxes — set your Default VAT rate, the Country your company operates from, and whether the store is B2B or B2C.
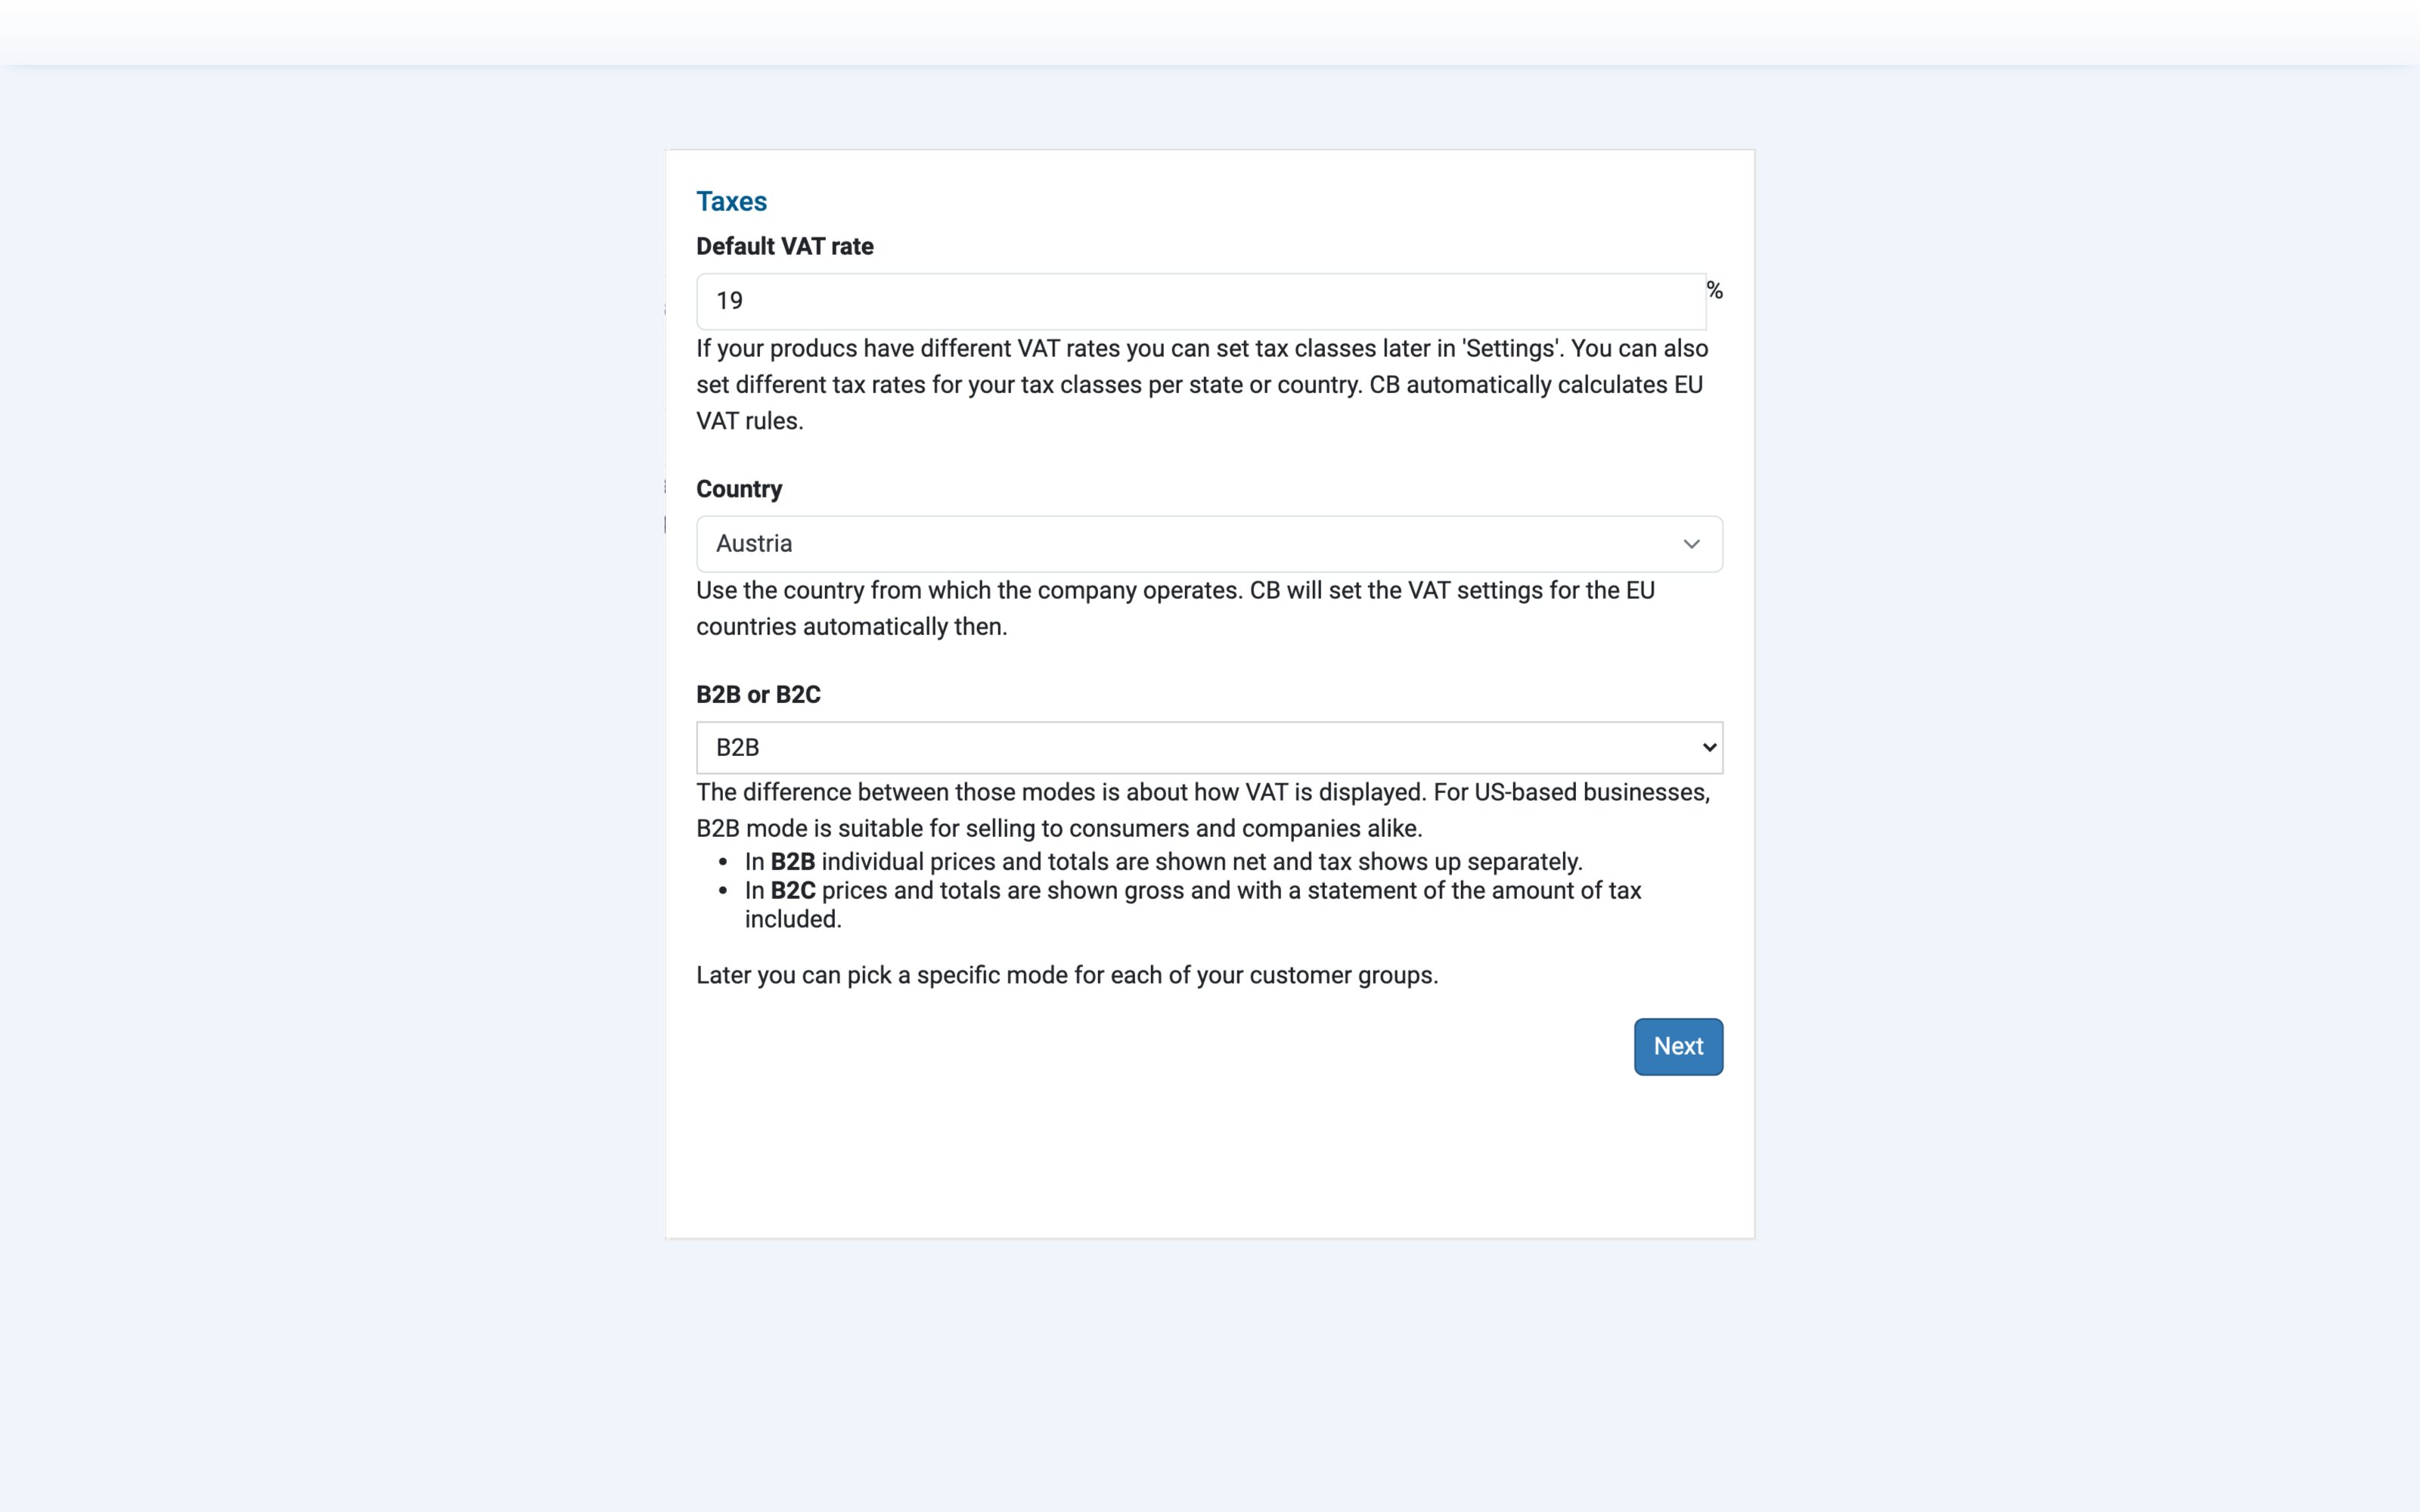
- The country matters beyond the rate: pick an EU country and CBX sets the EU VAT rules up for you.
- B2B or B2C decides how prices are displayed, not what is charged: in B2B, individual prices and totals are shown net with tax listed separately; in B2C they are shown gross with the included tax stated. US-based businesses are generally fine on B2B for both consumers and companies.
- You are choosing a default. Each customer group can override it later — see Set up customer groups.
- Products with different rates are handled by tax classes later, not here.
-
Store Information — your Store Name, Store Website and the Email for notifications (where CBX tells you about new orders and reviews). This is the data that ends up on invoices and in emails, so use the legal name and a monitored address. You can refine all of it later under Store Information — see Keep your store information current.
-
Currencies — define your base currency (name, symbol and code), then add any further currencies with their Rate.
The base currency is the second choice worth pausing on: every price you type anywhere in CBX is in the base currency, and other currencies are conversions of it. Changing it after you have priced a catalog means re-checking every price.
If you offer more than one currency, make sure the currency selector is placed somewhere visible on your storefront — otherwise customers cannot reach the other currencies.
-
All done! — click To the CBX Dashboard.
Platform note: which steps you get depends on your host. On WordPress the Language settings step is skipped — Next on the licence step takes you straight to Taxes. On Magento 2 the wizard stops after Language settings and finishes there: taxes, store information and currencies are Magento's own settings, so CBX does not ask for them — see CBX on Magento 2.
What happens next
The wizard is marked as completed and will not appear again — from now on, opening CBX takes you straight to the Dashboard. Everything you entered is editable in the normal screens:
| Set in the wizard | Lives afterwards in |
|---|---|
| Licence key | Dashboard |
| Languages | Settings |
| Default VAT rate, country, B2B/B2C | Settings, Countries, and per group in Customers |
| Store name, website, notification email | Store Information |
| Currencies | Currencies |
Go on to Work the list and edit screens, then build your first product.
Good to know
- The wizard is a shortcut, not a gate. Skipping a decision now costs nothing; every screen it touches is reachable from the menu.
- Each step is saved as you click Next, and the wizard only moves forward — there is no Back button. Stopping halfway loses nothing you have already confirmed.
- Languages and base currency are the expensive ones to change. Everything else is a two-minute edit later.
- The notification email is not the customer-facing address. It is where you get told about orders and reviews; the addresses customers see are configured with the order emails.
Troubleshooting
- The wizard doesn't appear. It runs only while the store is unconfigured — once finished, it is done for good. Everything it sets is in the menu screens listed above.
- You left the wizard halfway. Opening CBX takes you back to it, starting again at step 1 with your saved answers already filled in — click through to the end.
- Your language isn't offered. CBX lists the languages your site has installed. Install the language in your platform first, then add it under Settings.
- The licence key is rejected. Keys are bound to a domain. A staging or development hostname needs to be whitelisted for your key — contact Rovexo with the hostname.